USER GUIDE: How to create Read-Only Accounts
Smoobu continues to improve and introduced a new feature: create read-only accounts.
Starting today your cleaning staff or your partners can enter in Smoobu and you can decide what to share with them.
You can also choose for which apartment / s to share the information (all or in part) and you can create as many guest accounts as you need.
Follow the steps below to create permissions:
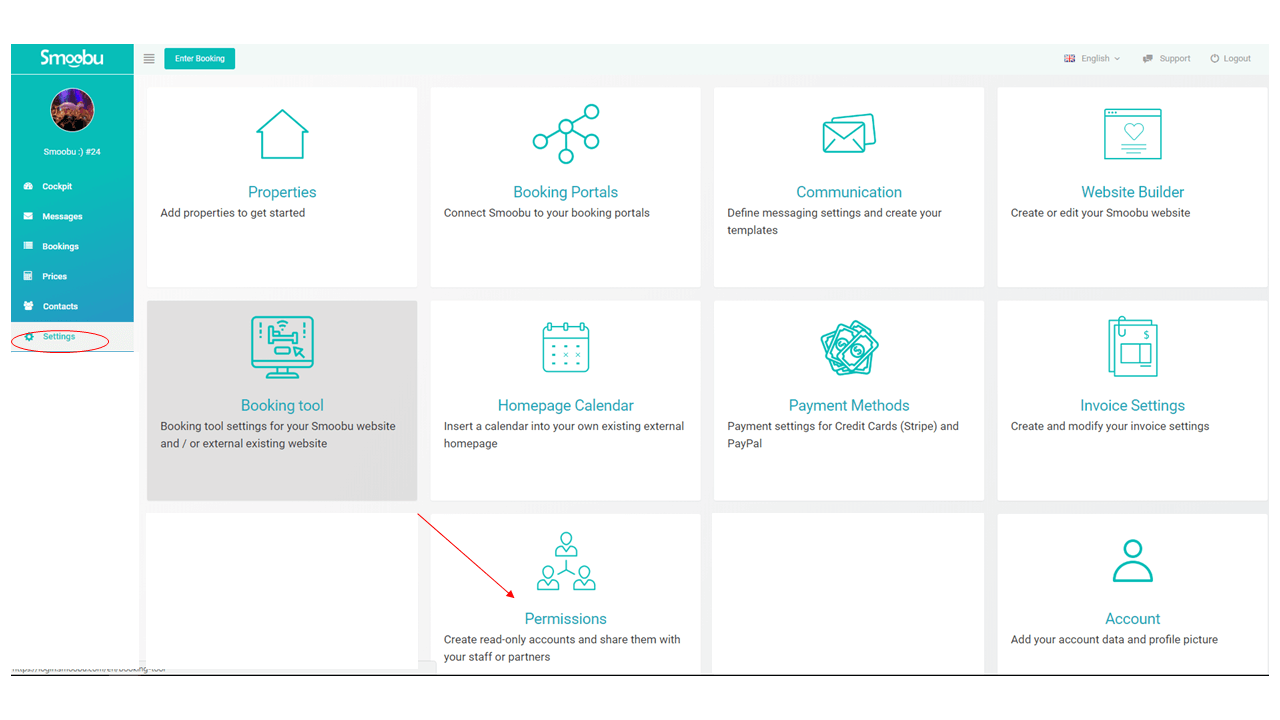
Click on settings -> permissions
Enter the email address of the person to whom you wish to grant permission by clicking on -> grant permission and then click on create
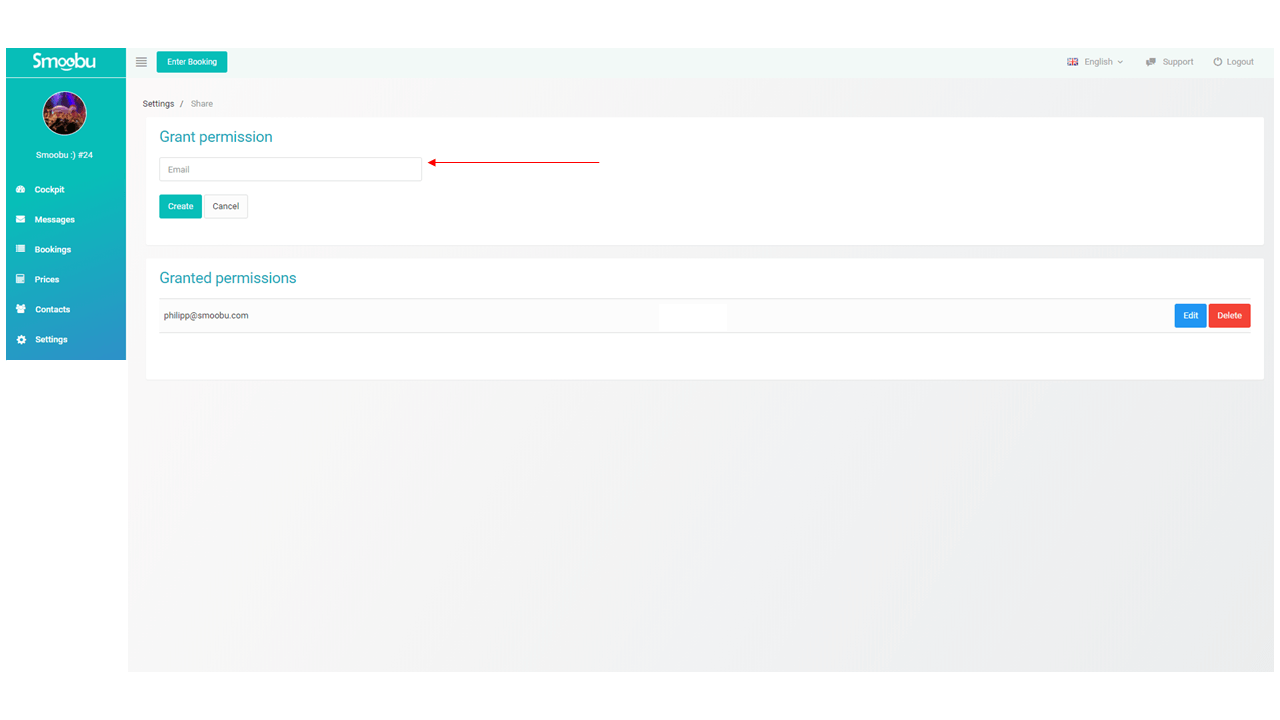
As soon as the email is created, you will see the email of the person you have just entered under "permission granted". At this point click on edit (blue button) and here you can choose what to share to the person to whom you have given permission.
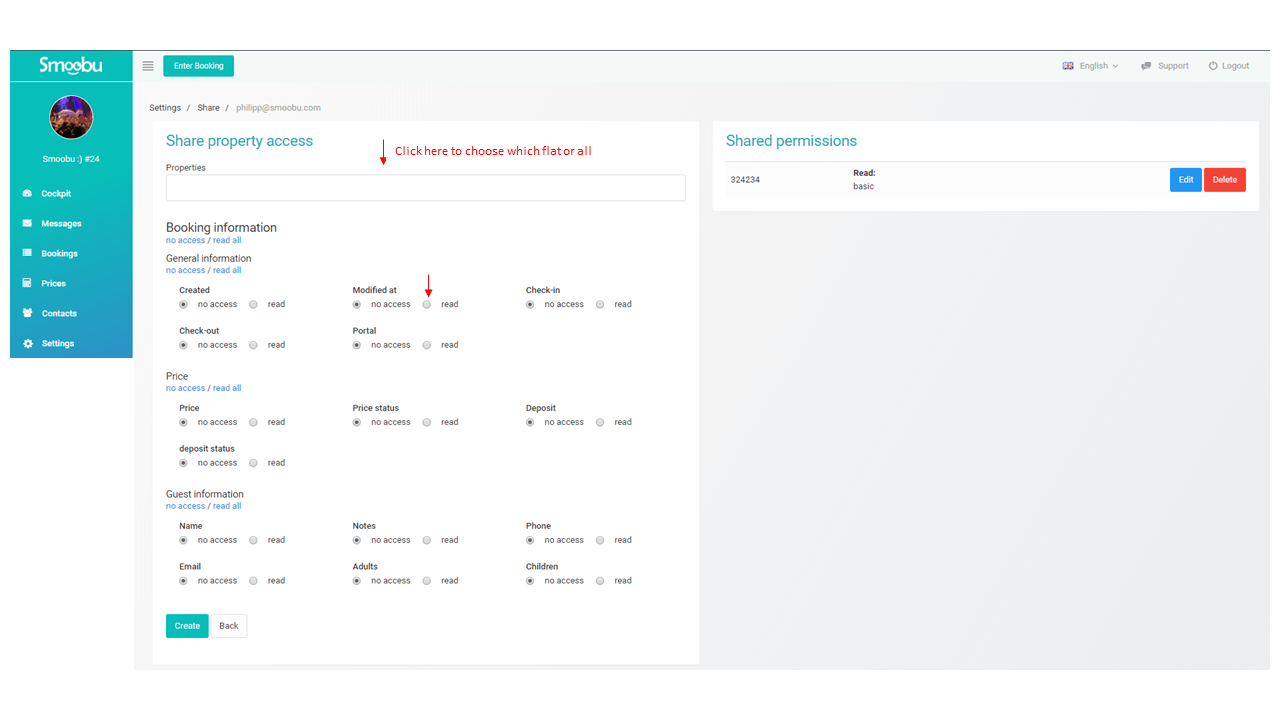
Typing the apartment name in the "apartments" field, you will share the information for that apartment or for several apartments.
Below you will find the fields: "General information", "Price", "Guest information" relating to the apartments and you can decide what show to your guest account and what not, by clicking on "read" or "no access"
Once you've finished, the person you gave access to will receive an email on their mailbox with a link. They should click on that link and enter the password where requested. He will be asked to enter a password and reconfirm it.
That's it! His read-only account is ready to be used. Keep in mind that there can't be a Test account with the same email address. Your employee can only have a read-only account.
Leave a comment